

User Token
A User Token provides user-scoped access. All actions are performed on behalf of a specific employee, and access is limited by that employee's permission group.
Create a Permission Group
Restrict the employee's access to only what the integration needs.
Go to Settings → Permissions → New Custom Group and select the permissions the integration should be limited to. This ensures the integration can only see and modify data you explicitly allow.
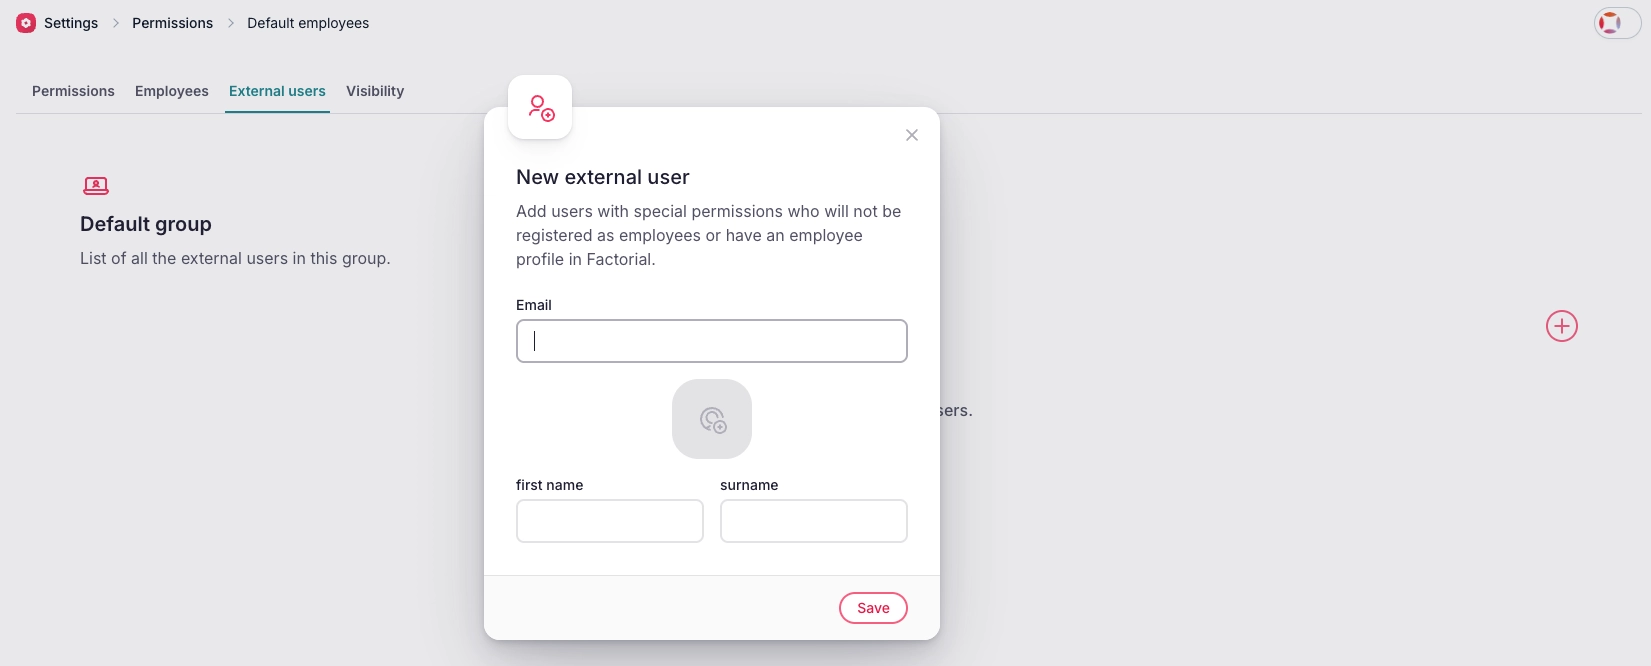
Create a Dedicated Employee or External User Account
Set up an employee account that will own the user token.
- Create a new employee in Factorial with a descriptive name (e.g.,
Integration User - Provider Name). Use a real email address you have access to, as Factorial will send an activation email. - If you outsource integration management to an external provider, you can invite them as an External User in your company settings.
Activate the Employee Account
The employee receives an activation email and sets their password.
Check the email inbox for the activation message. Click the link and set a password for the new account.
Create the OAuth Application (if not done already)
A Factorial admin creates and manages OAuth applications in Settings → Advanced configuration → OAuth applications.
- In Factorial, open Settings.
- Under Advanced configuration, select OAuth applications.
- Select Create OAuth app.
- Enter the application name, one redirect URI per line, and the scopes the integration needs. To test with Postman, use one of these redirect URIs:
-
Postman in browser:
https://oauth.pstmn.io/v1/browser-callback -
Postman desktop:
https://oauth.pstmn.io/v1/callback
If you have doubts about which scopes to apply, you can contact Factorial support.
-
- Choose the client type:
- Confidential client with secret if the application can store a client secret securely on a server.
- Public client without secret for browser, desktop, or mobile applications that cannot keep a secret.
- Select Save.
After saving, the OAuth applications page shows the application name, client ID, scopes, and redirect URIs.
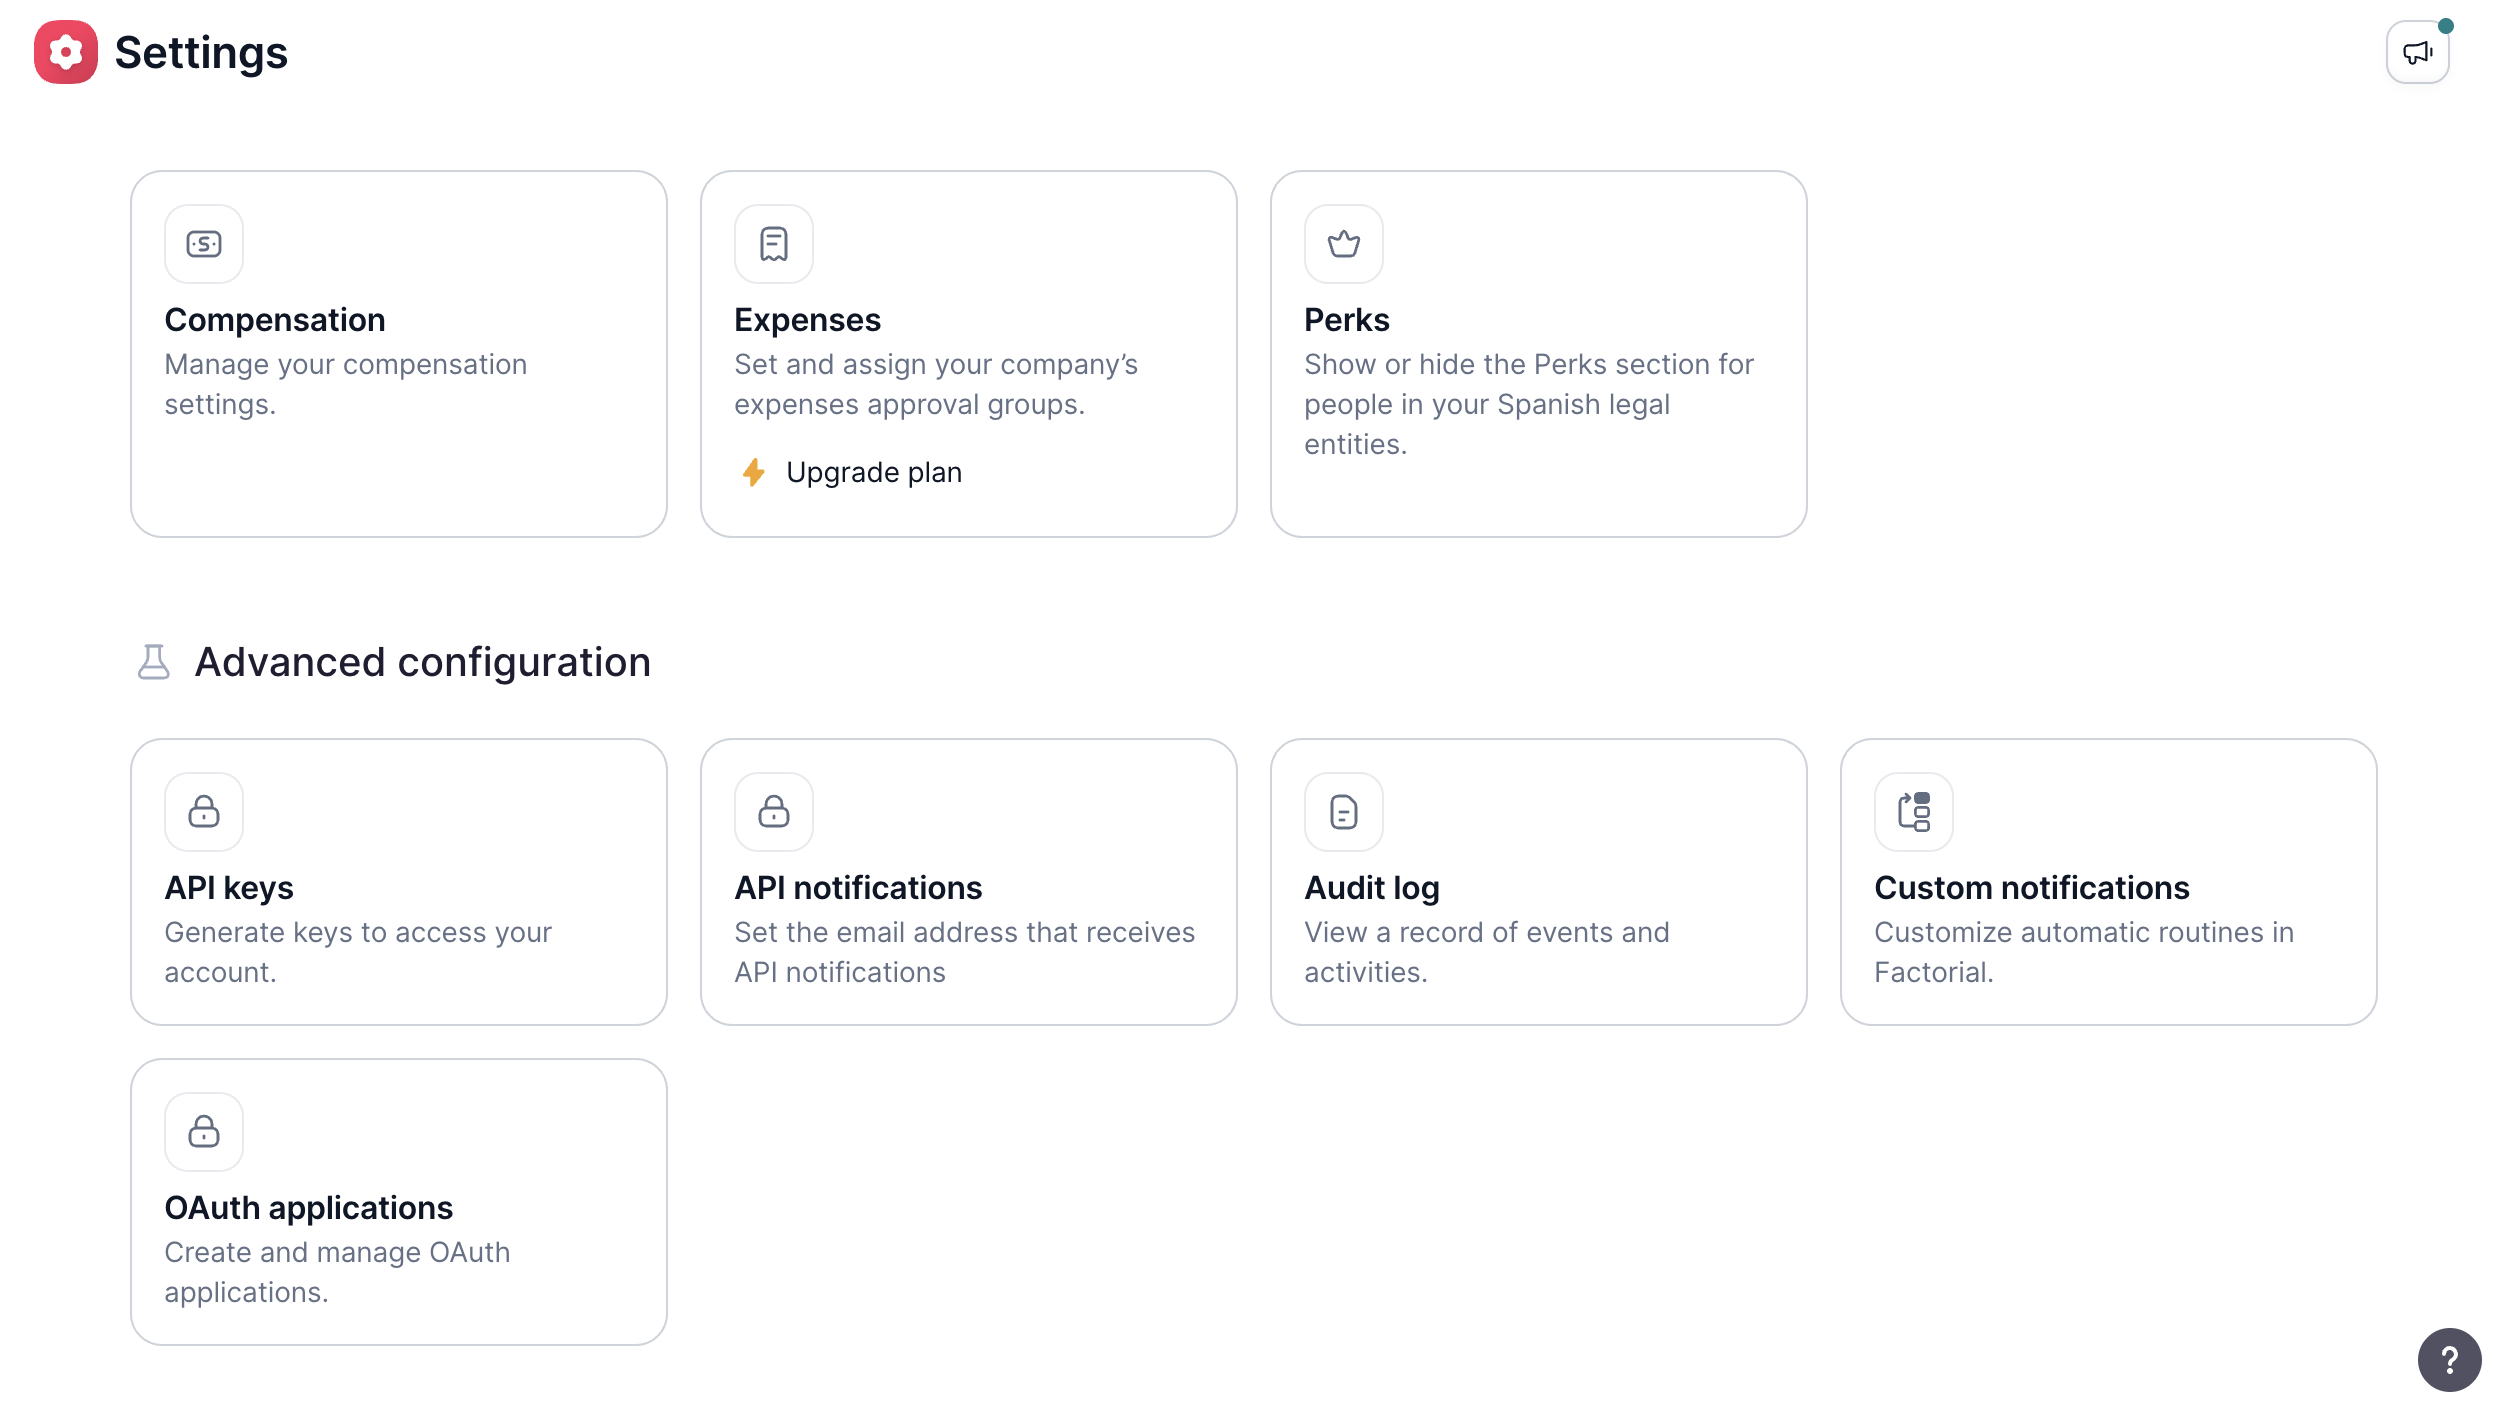
- In Settings, select OAuth applications under Advanced configuration.
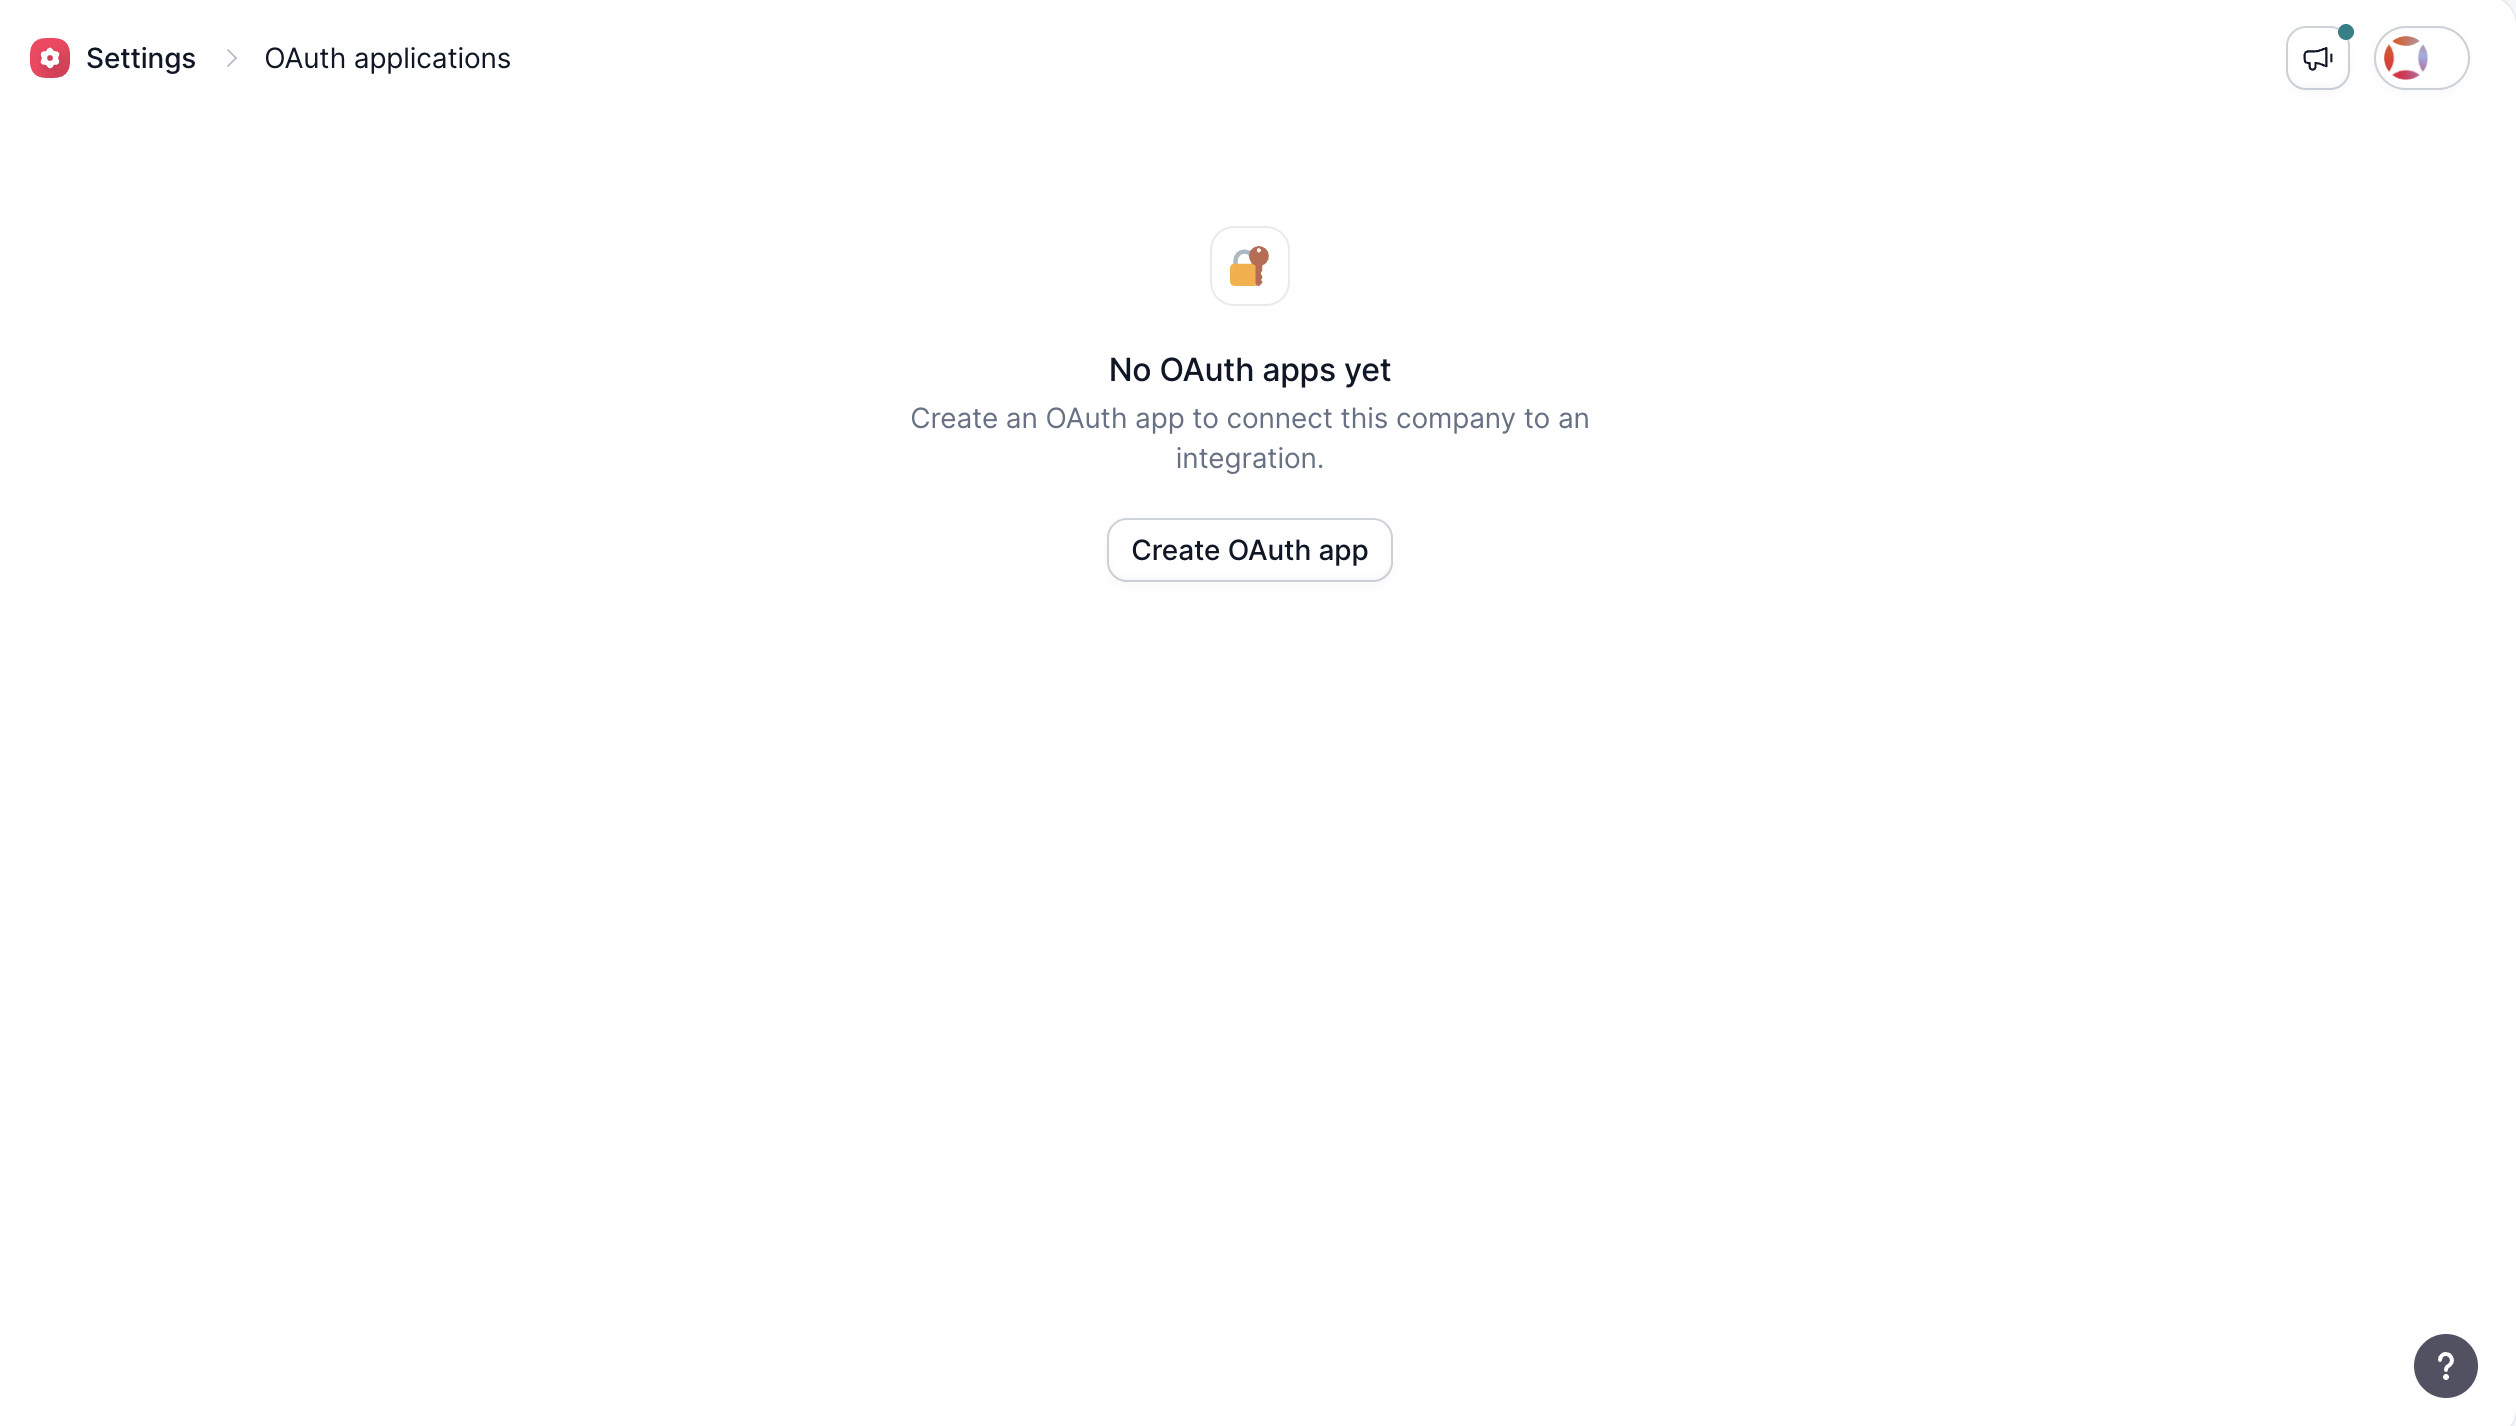
- Select Create OAuth app.
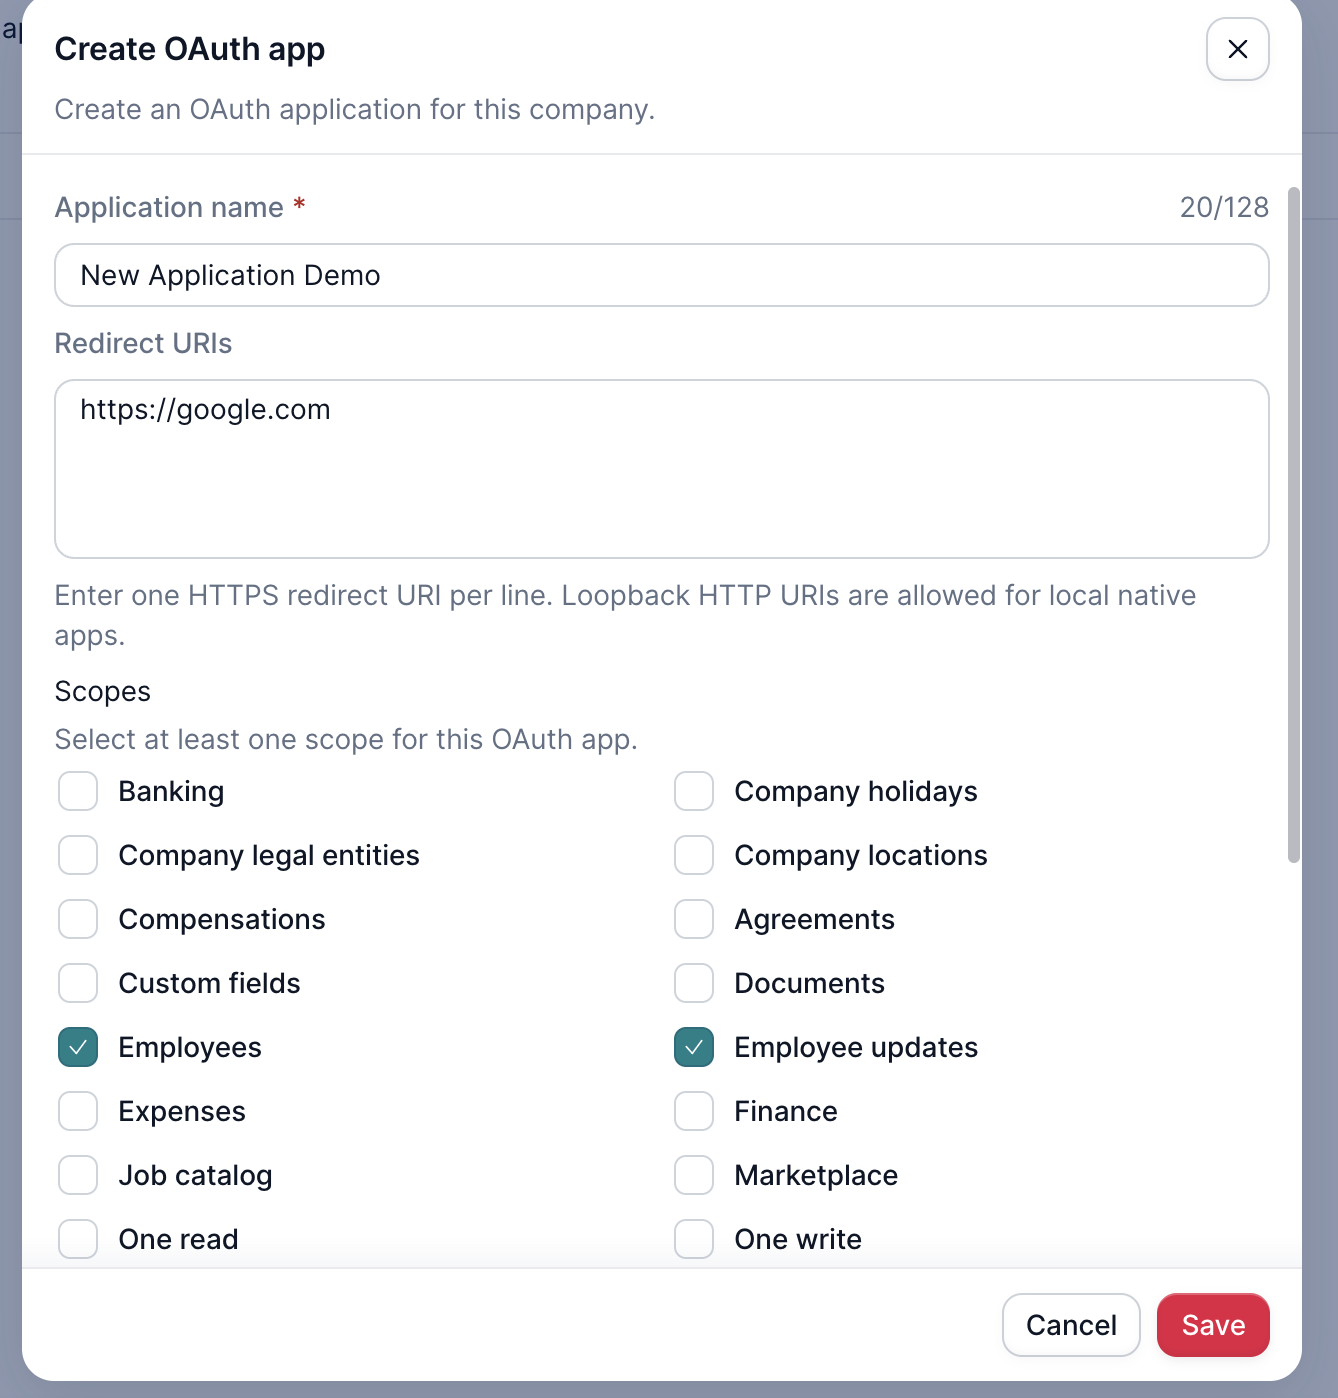
- Enter the application details, redirect URIs, and scopes, then save.
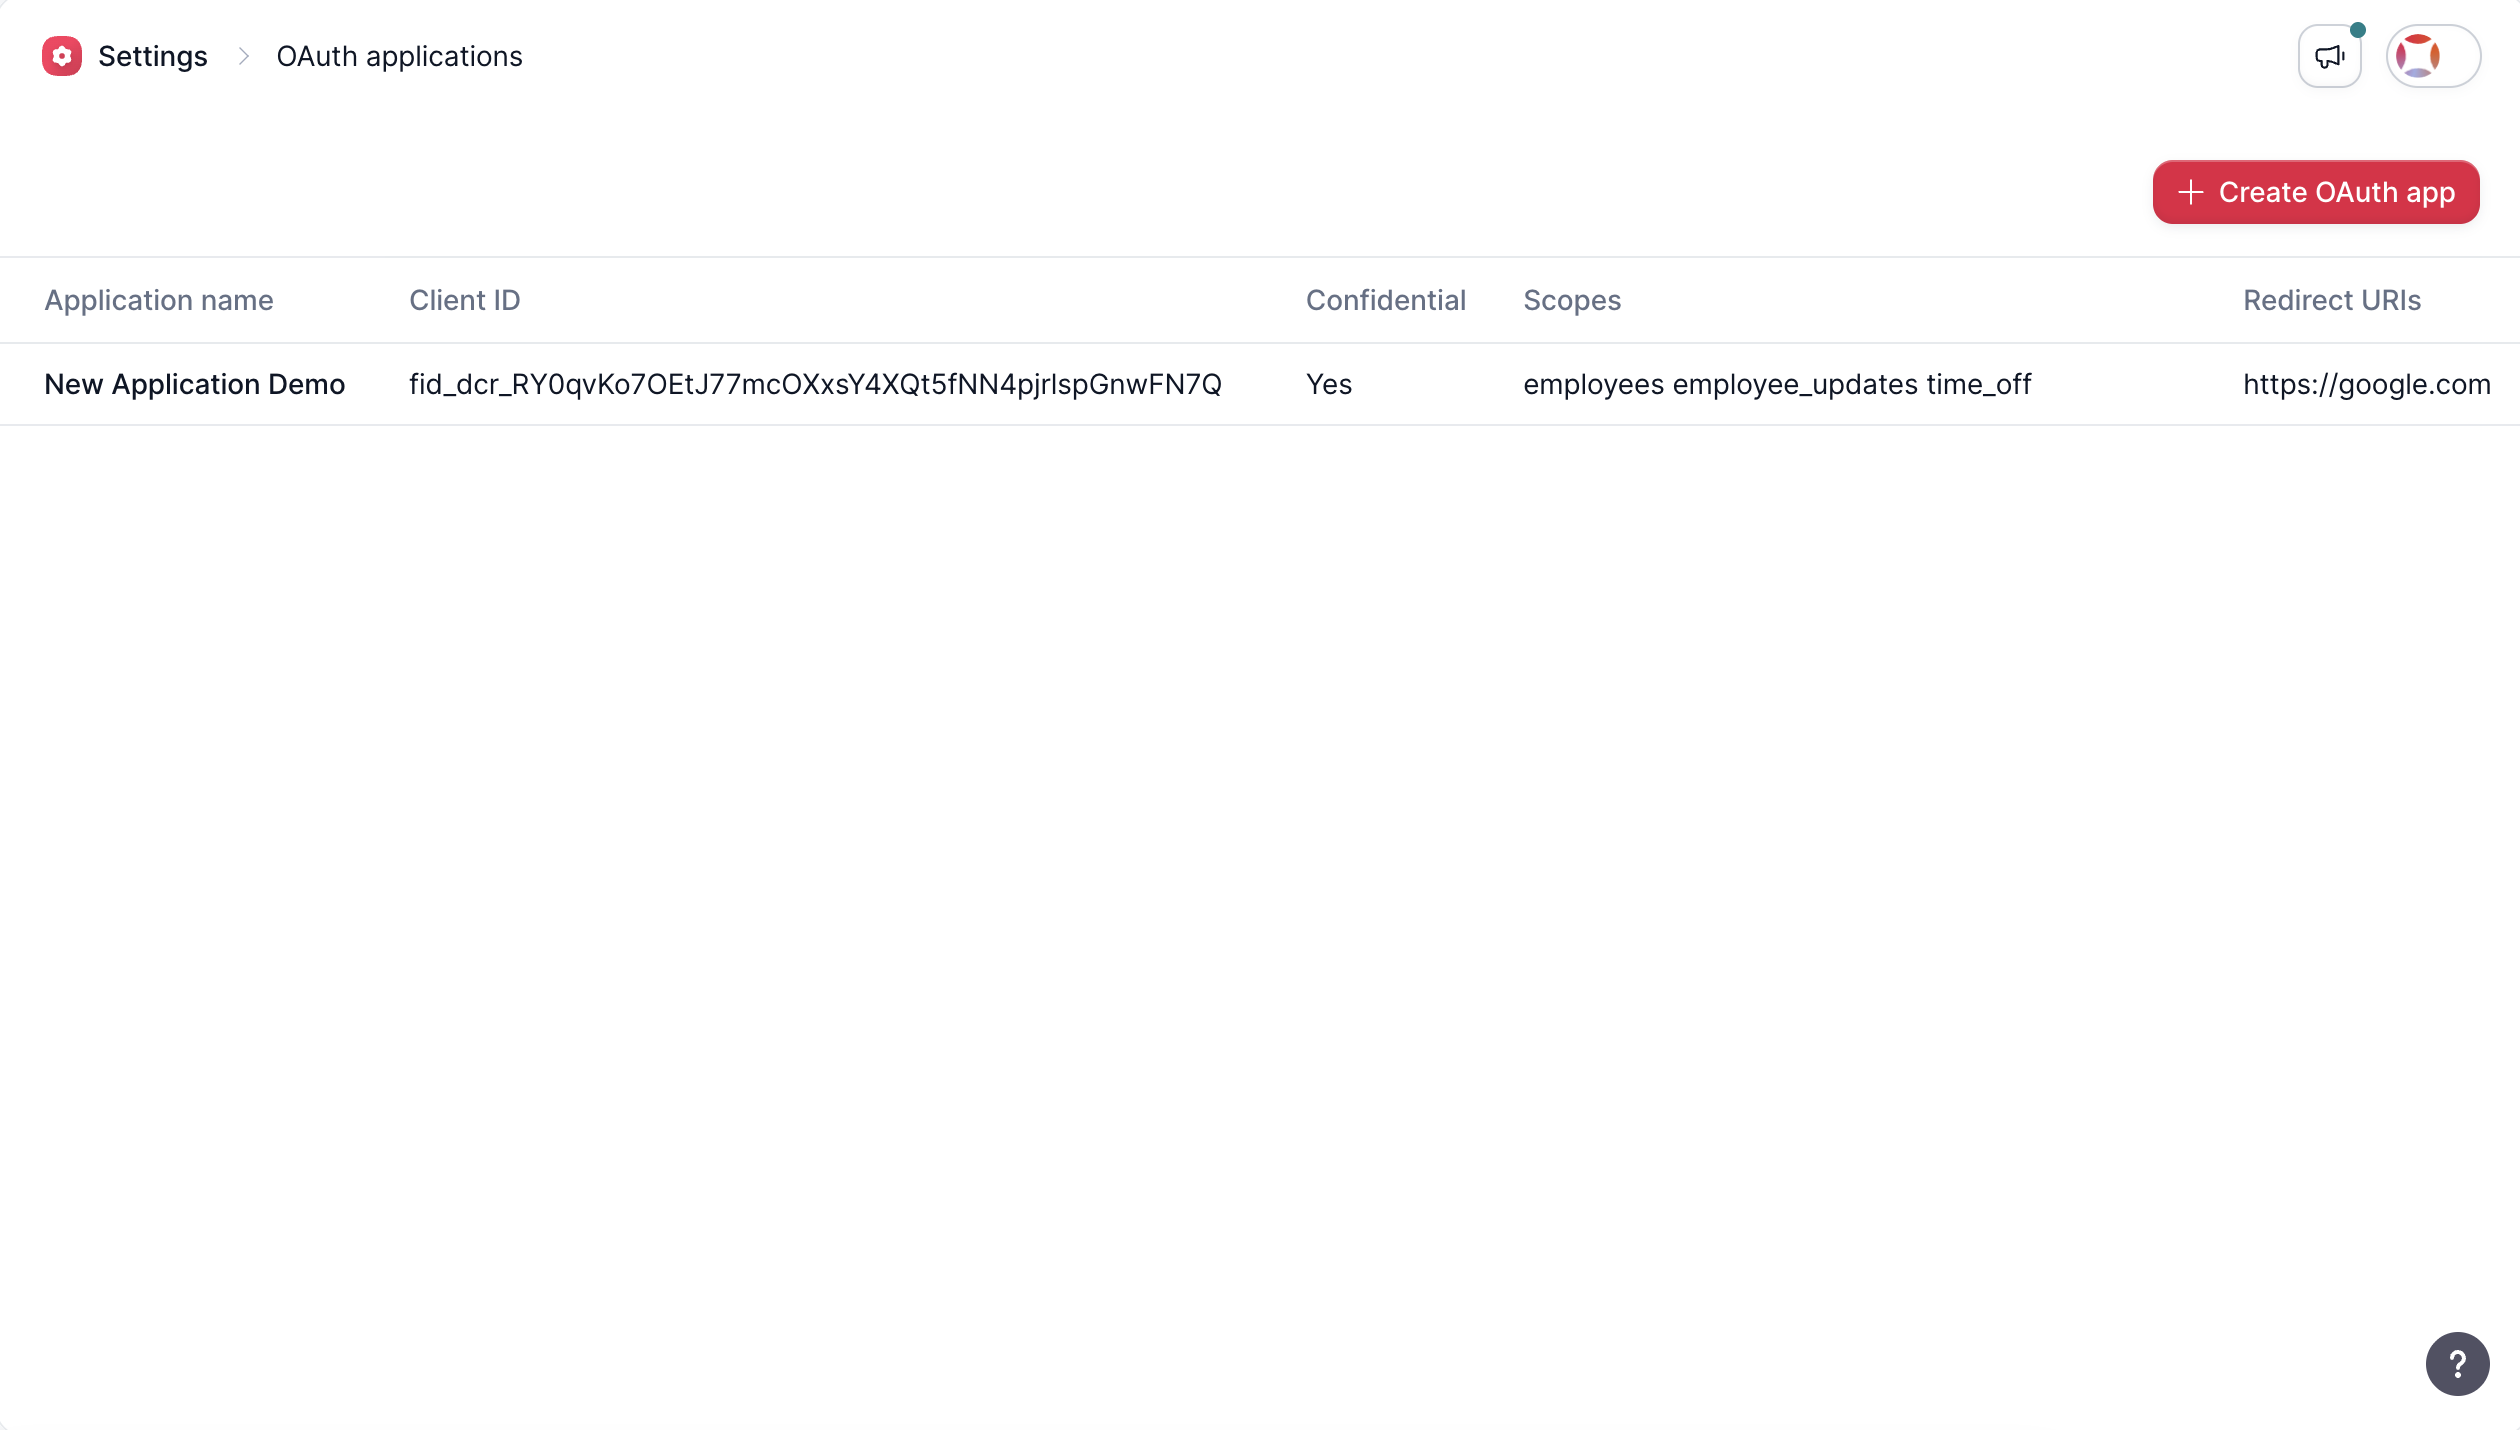
- The application appears in the OAuth applications list after it is created.
Choose the client type
- Confidential clients run on a trusted backend and can keep a client secret private. They authenticate with that secret when exchanging an authorization code for tokens.
- Non-confidential (public) clients run in environments where a secret cannot be protected, such as browser SPAs, mobile apps, or desktop apps. A client secret would be extractable, so it must not be relied on for authentication.
Public clients should use Authorization Code + PKCE
- Generate a random
code_verifierlocally.- Derive a
code_challengefrom it and send that with the authorization request.- Keep the verifier only in the client.
- Send the original verifier when exchanging the returned code for tokens.
Save Client ID and Client Secret
- The Client ID is always visible in the OAuth applications list.
- A client secret is created only for a Confidential client with secret. Copy it when it is shown and store it securely.
- Verify the redirect URIs and scopes are saved correctly.
Save and rotate the client secretIf the secret is lost or exposed, open the application in OAuth applications and use Rotate client secret, then update the secret in your integration.
Start the authorization request (User Token)
The OAuth applications page does not start authorization for you. After creating the application, your integration must send the integration employee or external user to the Factorial ID authorization endpoint. Use the application's client ID and registered redirect URI:
https://id.factorialhr.com/oauth/authorize?client_id=<CLIENT_ID>&redirect_uri=<URL_ENCODED_REDIRECT_URI>&response_type=code&scope=<URL_ENCODED_SCOPES>&state=<RANDOM_STATE>Where:
CLIENT_ID= Client ID of your applicationURL_ENCODED_REDIRECT_URI= a redirect URI registered in your applicationURL_ENCODED_SCOPES= the scopes to request, separated by spaces (%20)RANDOM_STATE= a random value your integration checks when the user is redirected back
For demo, use https://id.eu2.demo.factorial.dev/oauth/authorize with the same parameters.
Public clients (PKCE): also add
&code_challenge=<CODE_CHALLENGE>&code_challenge_method=S256, wherecode_challengeis derived from thecode_verifieryour client generated and kept locally.
Important: Since only admins can access OAuth applications in Settings, the admin must build the authorization URL and share it with the integration employee or external user. That user opens the link while logged into Factorial.
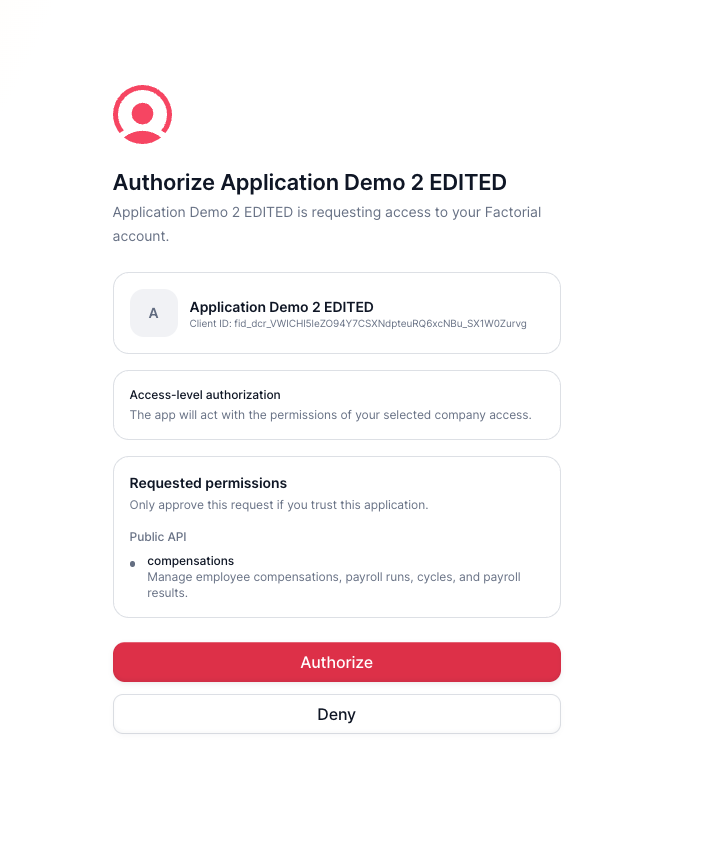
The Factorial OAuth consent screen for a user token.
The user signs in to Factorial, reviews the requested scopes, and authorizes the application. Factorial then redirects to the registered redirect URI with the authorization code attached at the end of the URL. For example:

https://oauth.pstmn.io/v1/browser-callback?code=elX2bzbV85mS90PU8319-mqxLcl-1MgSmuQlas33gwExchange Code for Access Token
Use Postman to exchange the authorization code for an access token.
- In Postman, go to My Collection → Get data → Authorization.
- Set the Auth Type to
OAuth 2.0.
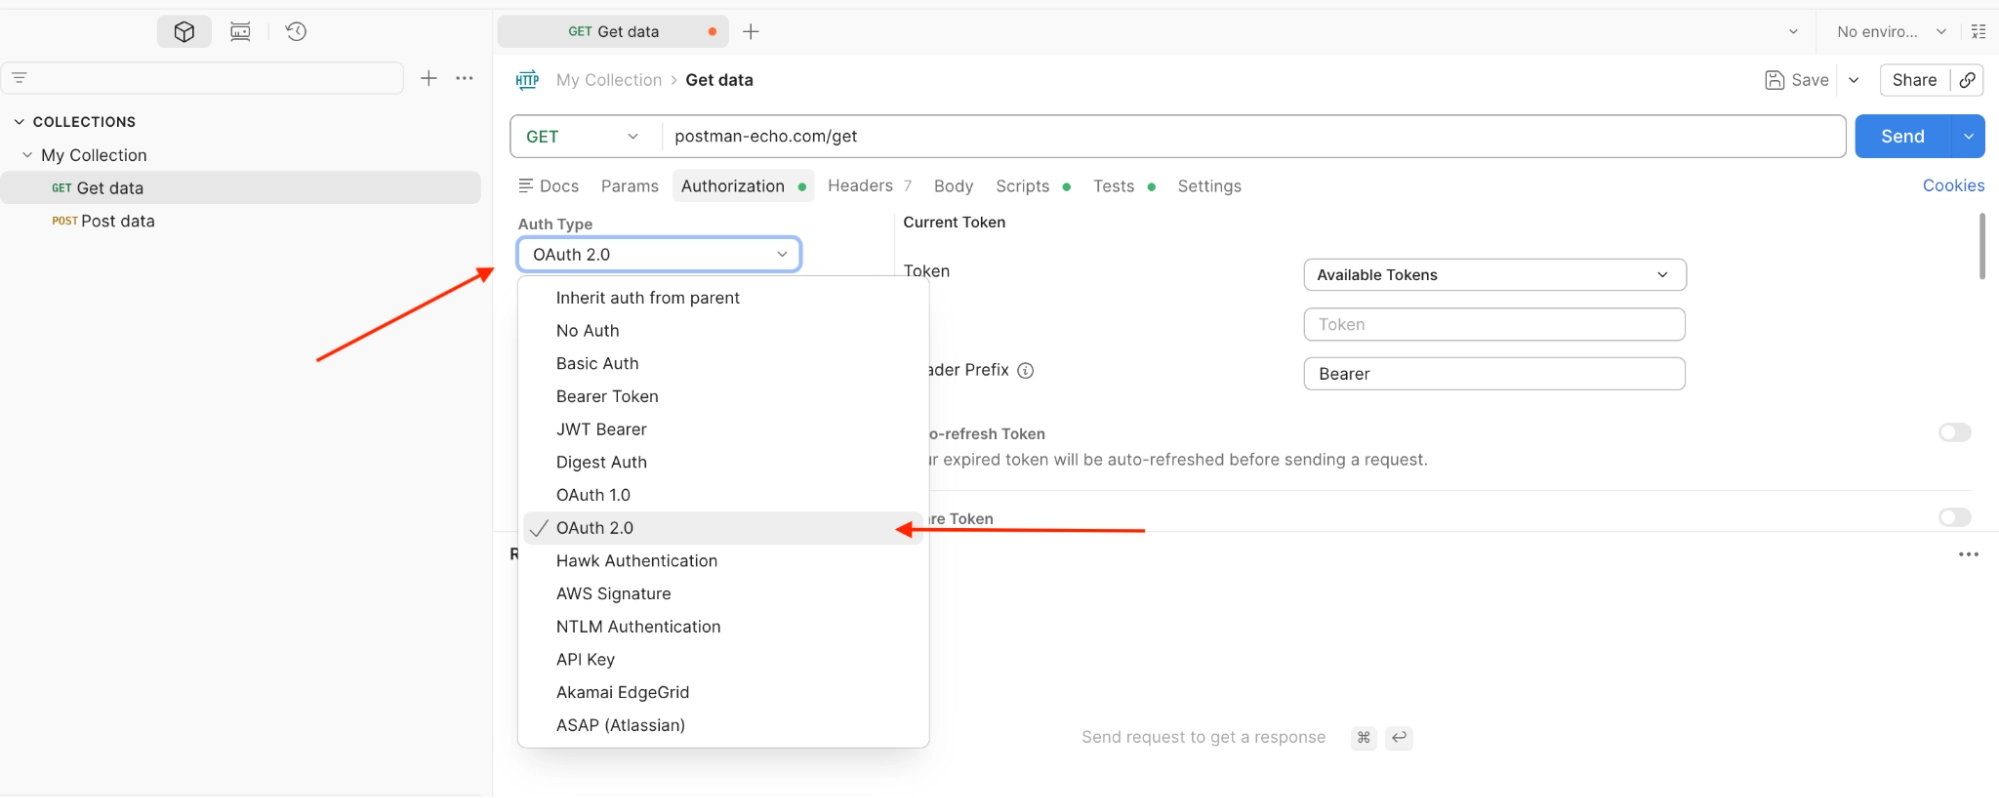
- Fill in the Configure New Token section with the following Factorial ID values:
| Field | Production | Demo |
|---|---|---|
| Auth URL | https://id.factorialhr.com/oauth/authorize | https://id.eu2.demo.factorial.dev/oauth/authorize |
| Access Token URL | https://id.factorialhr.com/api/oauth/token | https://id.eu2.demo.factorial.dev/api/oauth/token |
| Client ID | Your Client ID from the application | Your Client ID from the application |
| Client Secret | Your Client Secret (confidential clients only) | Your Client Secret (confidential clients only) |
For a Public client without secret, set Grant Type to
Authorization Code (With PKCE)and leave Client Secret empty. Postman generates thecode_verifierandcode_challengefor you.
- Scroll down to Auth Request and add a query parameter:
- Key:
code - Value: Your Authorization Code from the previous step
- Key:
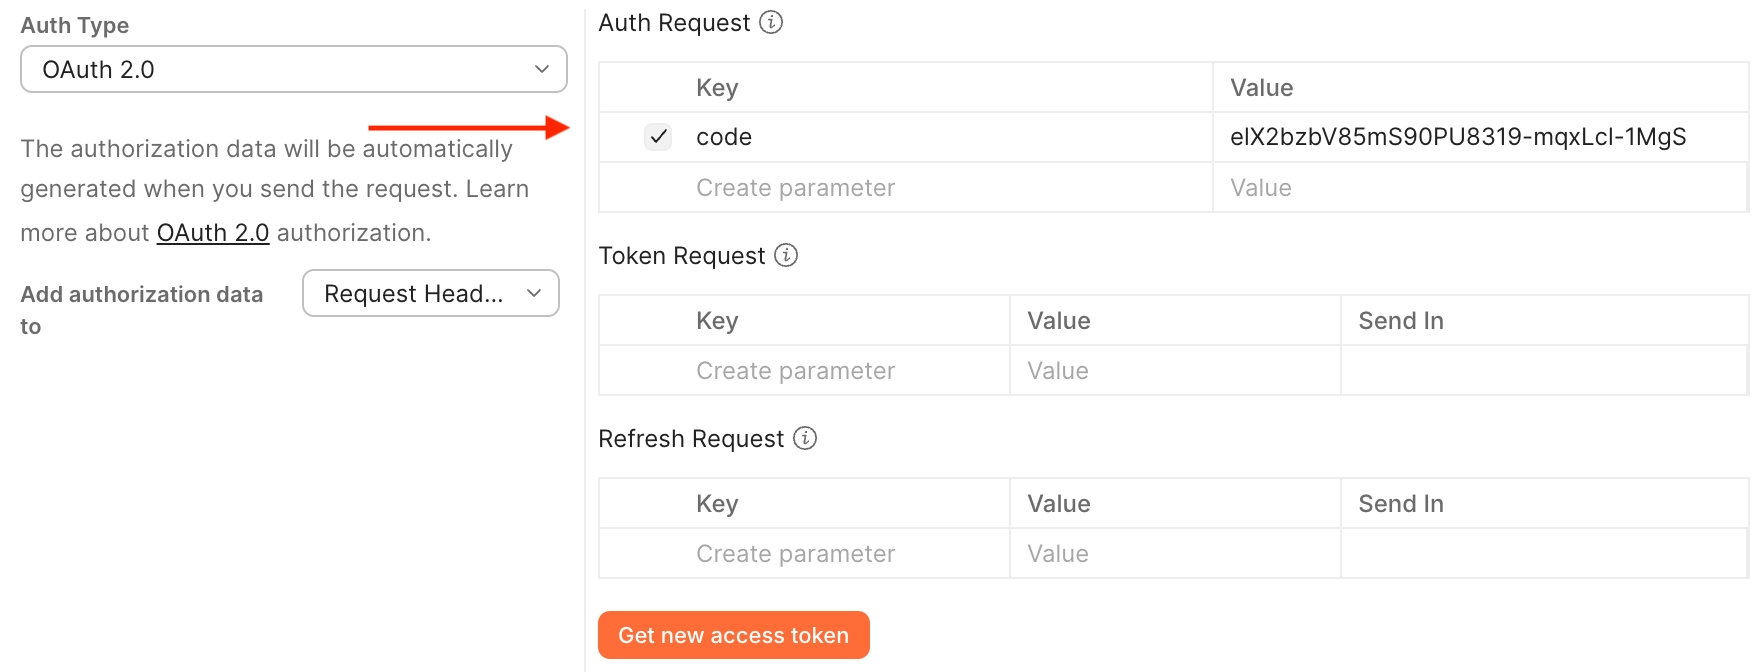
- Click the orange "Get new access token" button.
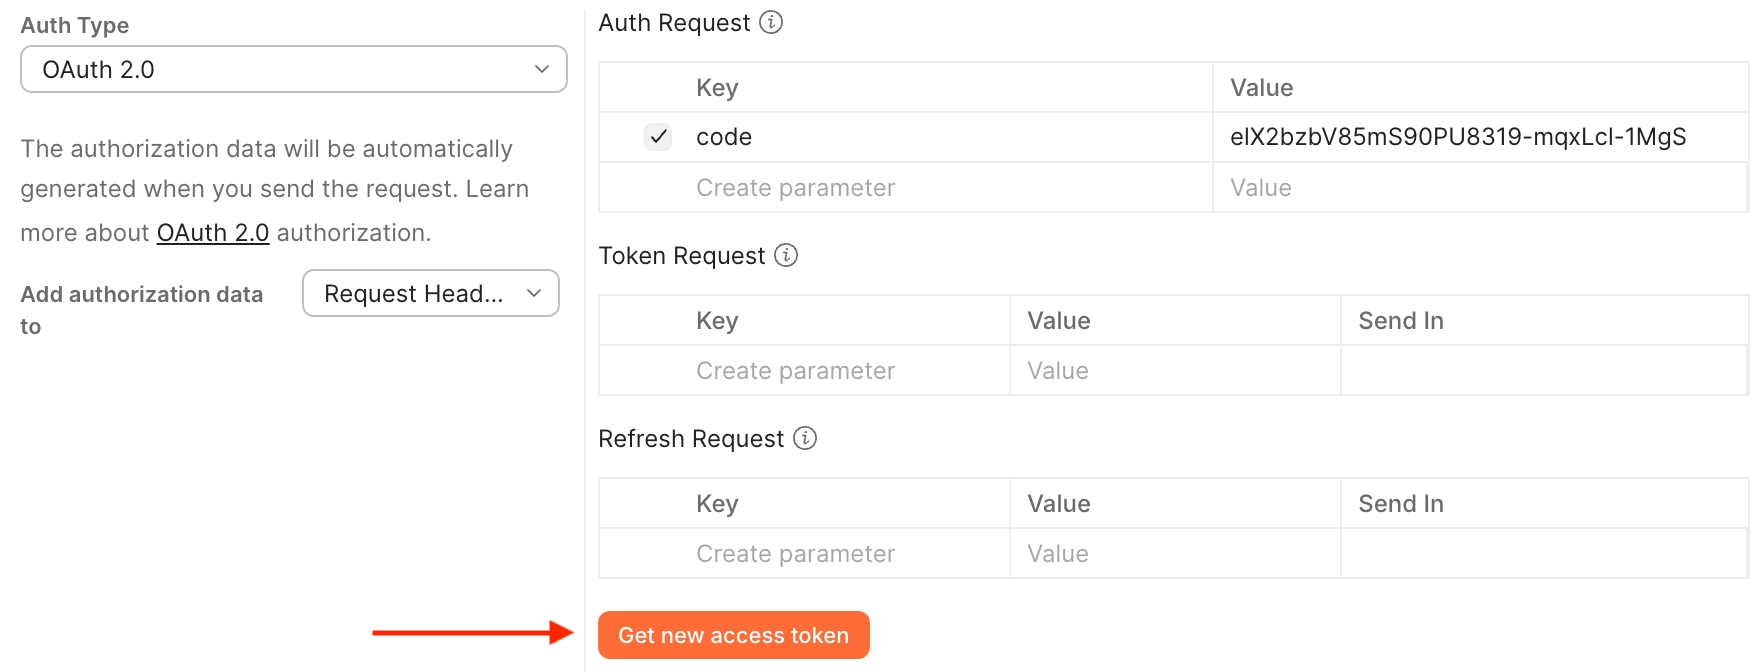
- In the pop-up window, sign in to Factorial if needed, review the requested scopes, and click "Authorize".
- After authorization, a pop-up in Postman will return your Access Token.
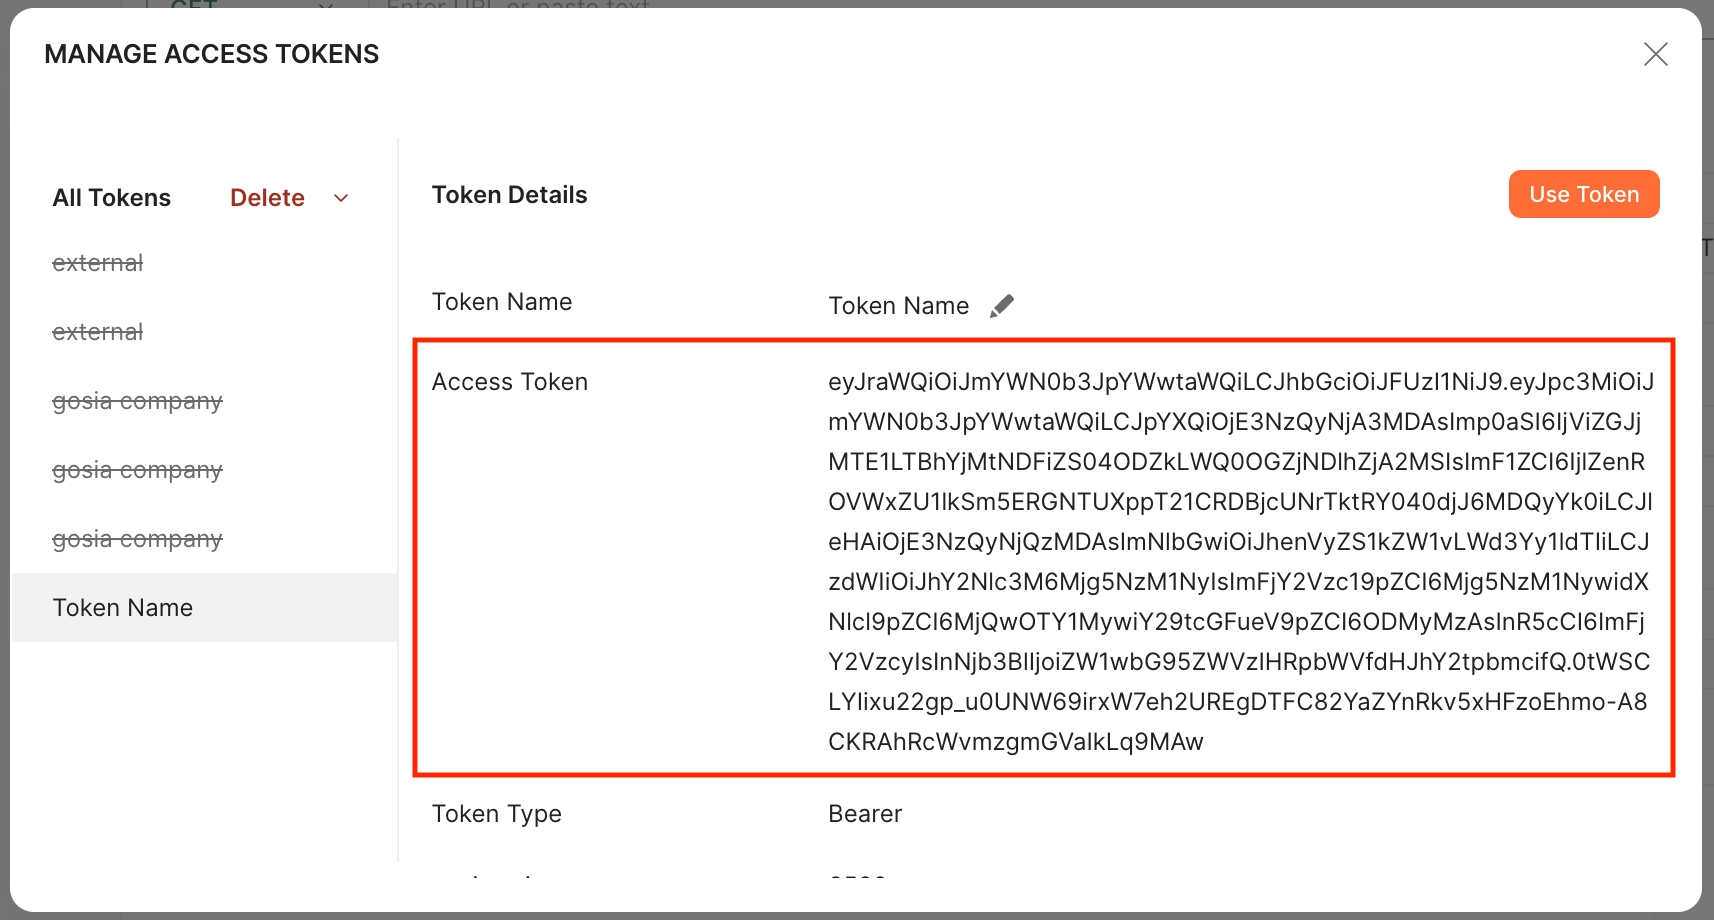
Existing integrationsExisting integrations can keep their current endpoints while they are migrated to the Factorial ID endpoints.
Exchange the code without Postman
Send a POST request to the Factorial ID token endpoint.
Confidential client
curl -X POST 'https://id.factorialhr.com/api/oauth/token' \
  -d 'client_id=<CLIENT_ID>' \
  -d 'client_secret=<CLIENT_SECRET>' \
  -d 'code=<AUTHORIZATION_CODE>' \
  -d 'redirect_uri=<REDIRECT_URI>' \
  -d 'grant_type=authorization_code'
Public client (PKCE): do not send a client secret; send the original code_verifier instead.
curl -X POST 'https://id.factorialhr.com/api/oauth/token' \
  -d 'client_id=<CLIENT_ID>' \
  -d 'code=<AUTHORIZATION_CODE>' \
  -d 'redirect_uri=<REDIRECT_URI>' \
  -d 'code_verifier=<CODE_VERIFIER>' \
  -d 'grant_type=authorization_code'
For demo, use https://id.eu2.demo.factorial.dev/api/oauth/token.
User Token Expiry: User access tokens expire after 1 hour. Save therefresh_tokento request new access tokens without re-authorizing.
Refreshing Access Token
User access tokens are valid for one hour. After this period has expired, request a new access token with a POST request to the Factorial ID token endpoint, providing the refresh token that came with the previous access token.
NoteNon-admin users can perform this action as long as they have the refresh token provided at time of first authentication.
Refresh-token lifetimeStore the refresh token securely and use it to obtain a new access token. If refresh fails because the token or grant is no longer valid, start the authorization flow again.
| Action | Production endpoint | Demo endpoint |
|---|---|---|
| Refresh access token | https://id.factorialhr.com/api/oauth/token | https://id.eu2.demo.factorial.dev/api/oauth/token |
| Revoke token | https://id.factorialhr.com/api/oauth/revoke | https://id.eu2.demo.factorial.dev/api/oauth/revoke |
curl -X POST 'https://id.factorialhr.com/api/oauth/token' -d 'client_id=<YOUR_CLIENT_ID>&client_secret=<YOUR_CLIENT_SECRET>&refresh_token=<REFRESH_TOKEN>&grant_type=refresh_token'Public clients: omit
client_secret.
Revoking Access Token
You can revoke an access/refresh token if you do not want it to remain active. This can be necessary in cases where you feel a token has been compromised.
NoteUsing a new token automatically revokes the previous token, and hence an API call is not necessary for that.
curl -X POST 'https://id.factorialhr.com/api/oauth/revoke' -d 'client_id=<YOUR_CLIENT_ID>&client_secret=<YOUR_CLIENT_SECRET>&token=<TOKEN>'

YOUR_CLIENT_ID: OAuth2 Application Client ID

YOUR_CLIENT_SECRET: OAuth2 Application Secret (confidential clients only)

TOKEN: OAuth2 Access/Refresh Token (whichever you wish to revoke)
Video walkthrough
Updated 1 day ago